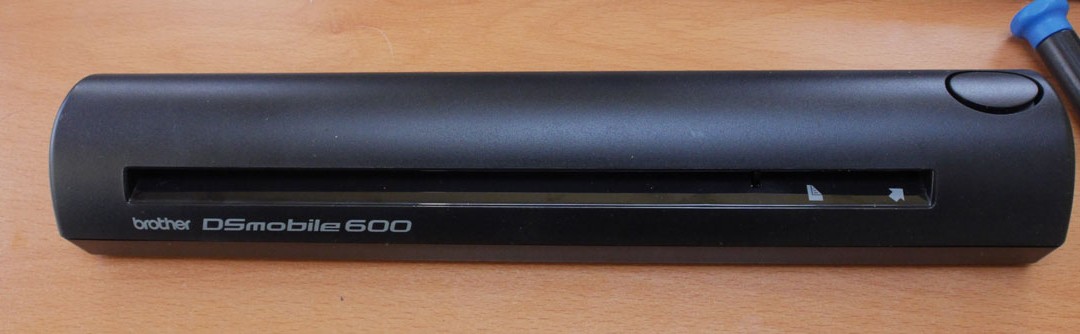
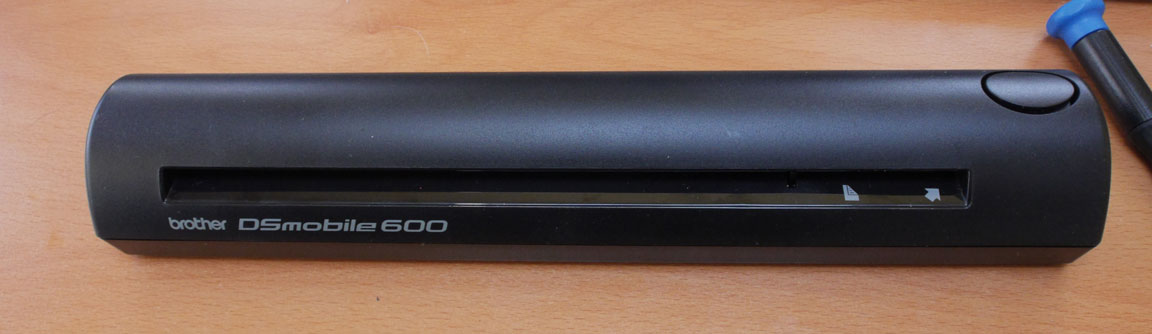
I, like a number of people going paperless, purchased a Brother DS mobile 600 scanner. It’s small, cheap and its powered through the USB port, so it’s nearly perfect. Except the paper slips and it doesn’t scan properly.
It wouldn’t scan because it only grabbed the paper on the left side, while the right side literally flapped in the wind. Every scan was a new piece of Dali-esque artwork, as the paper wormed it’s way back and forth across the scanner bed. Any attempt to guide the sheet was met with failure.
Now Brother usually builds pretty good gear, and it was too late for me to return it, (and honestly I didn’t want to – I just wanted it to work!). So I took it apart. It only took about 10 seconds to figure out the problem and twice that to fix it.
You will need a small (00) philips head screwdriver and a small plastic flat spudger. A clean spot to work is nice too, ’cause its a scanner.
Warning, This will void your warranty, Please note that I’m not encouraging you to do this and I am not responsible for anything bad that happens because you followed these instructions. In fact, turn back now. Those wavy scans aren’t so bad after all. They are sharpening your Photoshop skills.
BTW, click on any image to make it bigger.
So this is what I did.
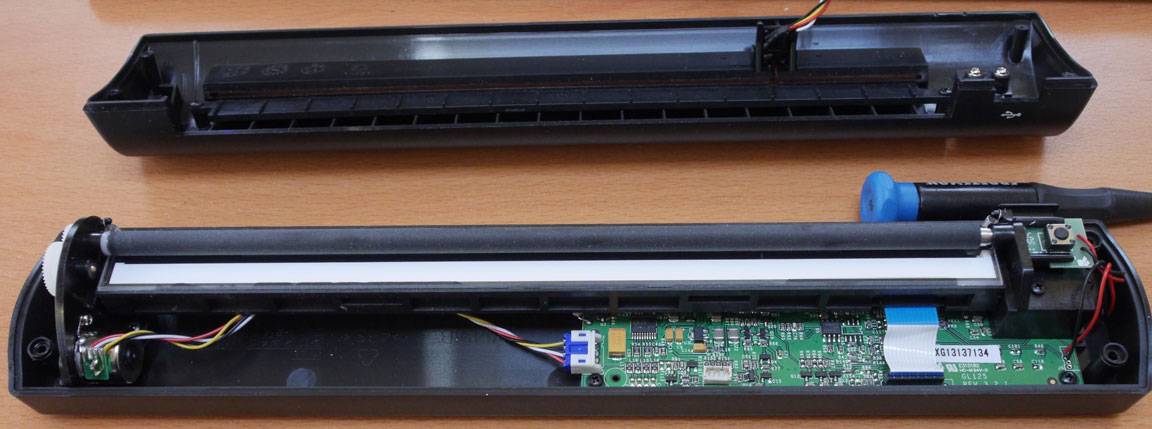
That is the one. You know it. No need to dwell on it.
Step 1
Unplug the scanner from your computer.
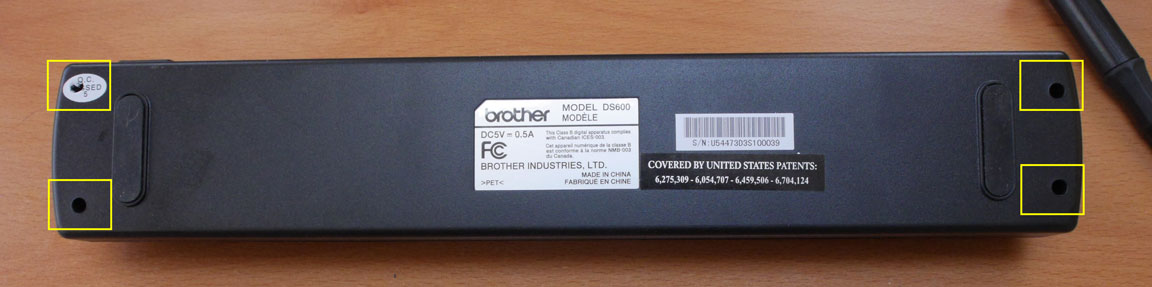
You will need to remove the 4 philps head screws on the bottom.
There is a sticker over one of the screws that says: “ZOMG, Don’t!” or “Passed by QC Sec. 5” (LOL). But clearly you’ve thrown caution to the wind and that sticker is no match for your screwdriver.
Step 2
Carefully separate the top of the scanner from the bottom.
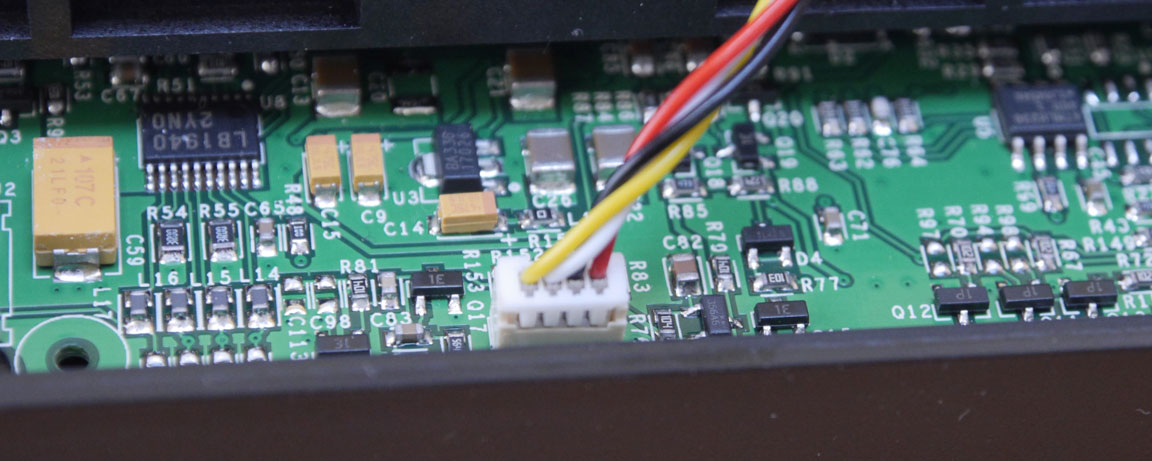
There is only one electrical connection
Gently pull the plug out by the plastic connector. Emphasis on the gentle part.
Make a note of the orientation of the plug as well.
Success.
Step 3
Start with the scanner facing you as if you were feeding paper into it, with the green circuit board to your right.
The rubber roller assembly is drawn towards the scanner bed by springs.
Small ones on either side and a larger one in the center, acting on the scanner bed.
But there needs to be a small gap here. If the rubber roller contacts the scanner bed it will damage the scanner. To keep the roller from touching the scanner bed, there are small clear spacers, similar to transparent tape on the edges of the scanner bed itself. If you hold the scanner up and look at the gap (use a light wall as a background) you will see the gap difference between the left and right side.
On my scanner, the left side clearance is correct with the spacer, but on the right side the spacer creates a gap visibly taller than the left side, and the rubber roller never contacts the paper as it goes through.
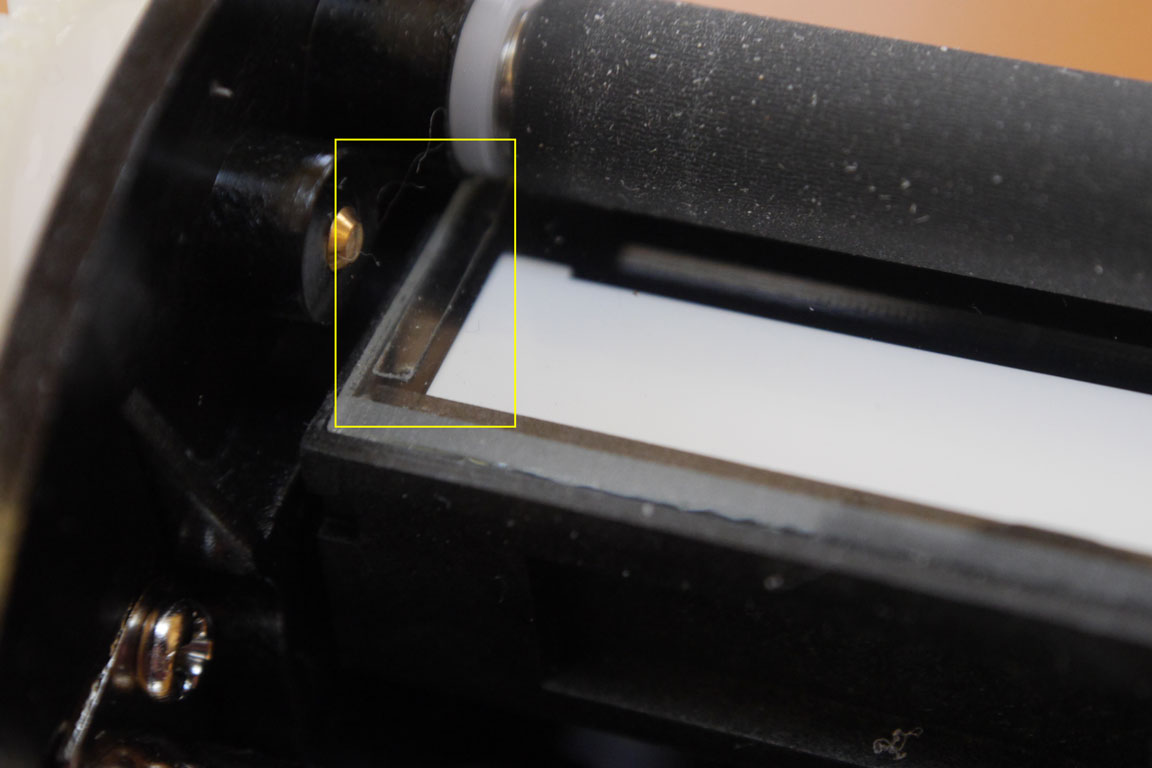 (This is the left side. Leave this side alone if the paper grabs properly here)
Therein lies the rub (or lack thereof).
So, one solution is to gently remove the spacer on the slipping side using a thin plastic spudger.
The area with the spacers is out of the scan area, but you still want to take your time and be very care to remove the sticker and any residue without scratching the surface.
I would recommend doing this without removing the tiny springs. They could be easily lost and are a pain to get back on.
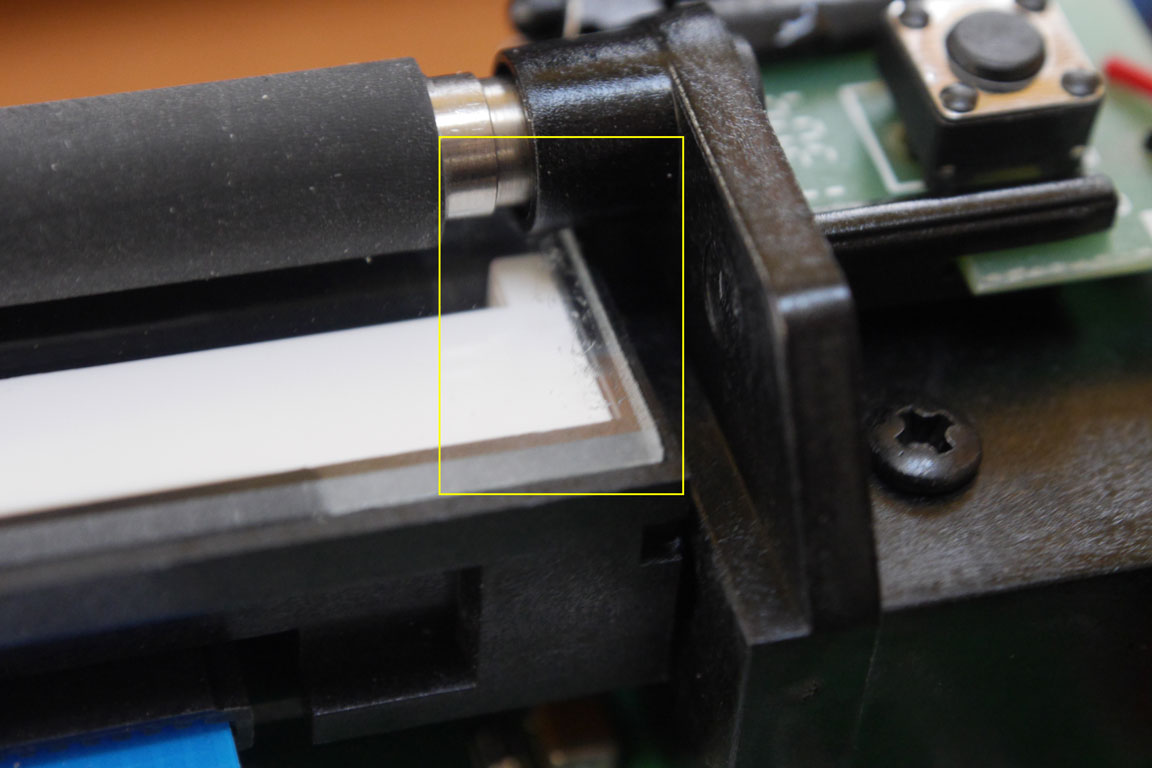 (This is the right side after I removed the tape spacer.
Once the spacer was gone, the gap between the roller and scanning bed, was the same from left to right.
Step 4
Make sure the scanner bed is clean and then reconnect the wires from the top of the scanner to the bottom.
The plug should reseat easily. If it doesn’t, check to make sure you have it oriented properly. It only connects one way.
Snap the scanner covers together and replace the 4 screws. Do not over tighten.
Connect the scanner and marvel how evenly the paper feeds through the device!